Once you’ve decided which questions you’d like to ask, you want these to display on your customized checklist. Any changes that you make to an existing customised checklist, and any new checklists that you create will be visible to everyone in the review stream (see ‘Selecting a checklist’).
Making and saving changes to an entirely new checklist (creating a new template)
Default checklists are not editable. Changes that you make to your default Summary Panel checklist must be saved as an entirely new checklist. This means that the first time you customise a checklist, you will be creating a new template. There will be other occasions when you also prefer to create a separate checklist, rather than making changes to an existing one.
To save your changes as a new template, click the ‘save as new template’ button at the bottom of the panel.

A ‘save a new template’ modal will present.
A default name will already be displayed, but you can change it here. The template must have a name in order for it to be saved. The description field is optional, but it may help other users decide whether or not to use your template.
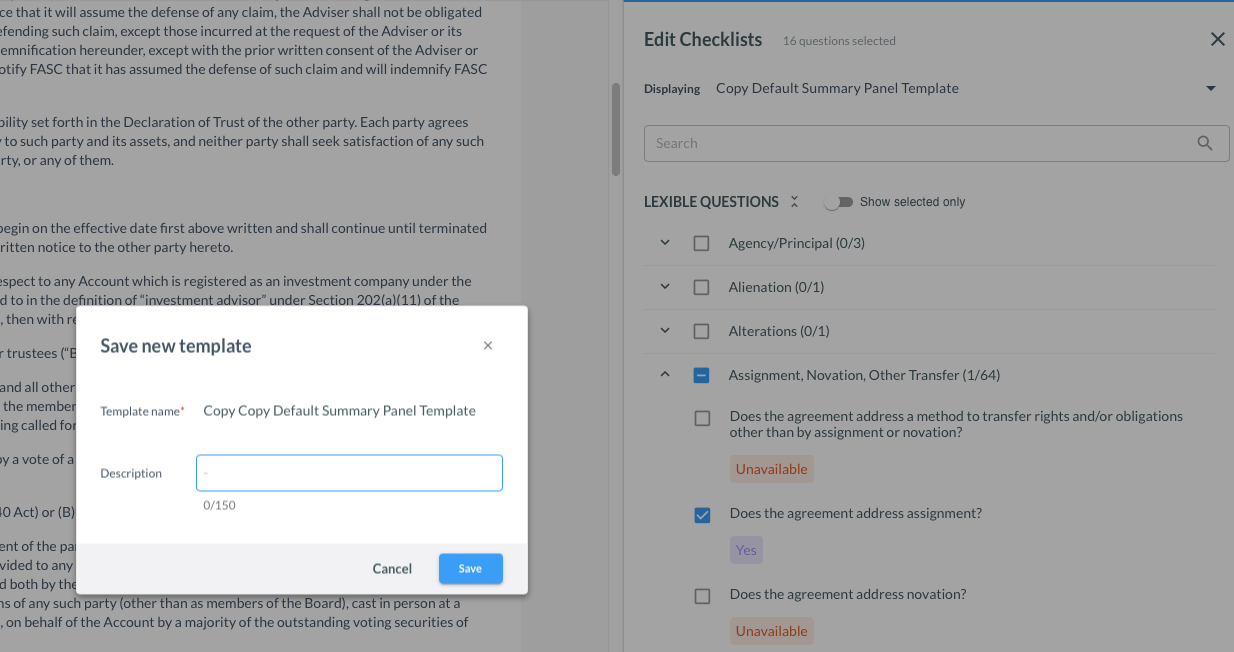
Click ‘save’ to save the new template, or ‘cancel’ to exit from the action.
Your new template will automatically display on the Contract summary tab, and will be available in the the 'Displaying' dropdown, selectable by everyone in the Review Stream.
Checklist display order
The default summary panel template displays Lexible questions in alphabetical order. When you add new questions to your checklist, they will automatically appear at the bottom of your checklist.
You can reorder your checklist by using the 'drag and drop' icon.
We will save the new order of your checklist so that it displays in that order wherever the checklist is used. The order of the checklist will also persist in the 'Contract Summary' view of the contract Report.