Tailor the level of risk for your business
Once you have created an editable policy you can customise the risk assigned to properties. Click on the dropdown under the policy and select the ‘Customise Risk’ option.

You will see 4 tabs on the top left-hand side.
Tab 1 contains all the questions that are currently in the relevant risk policy. To make edits, you can either select the relevant property by scrolling through the list or search for it using the search bar.
When you open up the property you will see the Risk Label, Risk Indicator and Advice Notes, which you can then edit accordingly.
A Risk Label is where you can enter a description of the risk, for instance whether the agreement addresses Force Majeure or not or whether something within the agreement is unusual or unexpected.
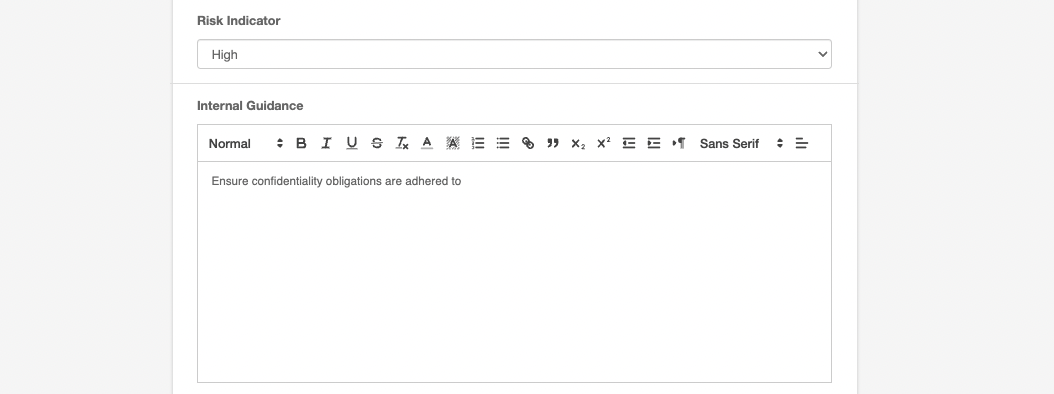
Risk Indicators assign a level of risk, ranging between High to Low. Risks are flagged within your agreements according to the level or risk assigned. For example, if the absence of a Force Majeure clause within your agreements is set as a High risk, this will be flagged as such in ThoughtRiver’s assessment and posing this as a potential issue. You can change the risk indicator by clicking on the dropdown and selecting the relevant risk level.
Internal Guidance is where you can guide business users or lawyers through a contract review and negotiation, allowing them to self-serve and return a first issues list to the counterparty. Internal Guidance can be inserted as comments into the document for your team members to consider. In order to add or amend Internal Guidance, scroll down to the Internal Guidance section for the relevant property, add the information and click 'Save.'
External Comments is where you can provide third parties (usually counterparties) with an explanation about why drafting amendments have been made, as part of the negotiation process. External Comments can also be inserted as comments into the document for the third party to consider. In order to add or amend External Comments, scroll down to the External Comments section for the relevant property, add the information and click 'Save.'

As a user, you would configure Yes and No risk positions for each of the questions within your policy and include Risk Labels and Internal Guidance where relevant.
There are separate ‘Save’ buttons for the Yes and No section, so ensure you click on both the Save buttons to save your work. These buttons only appear once you have changed something so don’t panic if you do not see them immediately!

Once the information has been configured, it will appear in review as seen below:
